DIY Moments: Vol. 18 No. 4
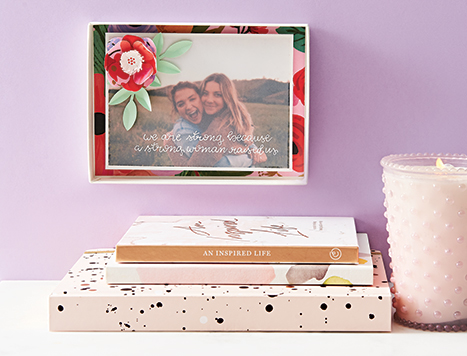
Celebrate the woman who gave you everything with a meaningful DIY gift. This photo box is inexpensive and easy to make, yet goes the extra mile to show Mom how much she means to you.
What You’ll Need
- Luxe White Box Mailer – A7
- Vellum Paper for Inkjet Printers 8.5 x 11- 30#
- Garden Party Flat Wrap
- Memory Tape Runner Permanent XL
- Uniball White Gel Pen
- Foam Squares Combo Pack
- 8 ½ x 11 Paper in White
- 8 ½ x 11 Paper in Mint
- Hydrangea Paper Punch
- Five Leaf Branch Paper Punch
- Zots Memory Small 300/pk
- Bone Folder 6”
- Metallic Gel Pens
- Gold Scissors
Step 1
Choose and print your photo. If you are using the small photo box, a standard 5″ x 7″ photo is recommended.
Step 2
Cut vellum paper to the size of your photo, and cut decorative paper (we used Garden Party Flat Wrap) to fit the inside of your box.
Step 3
Use tape runner along the back edges of the decorative paper and adhere it to the inside of the box.
Step 4
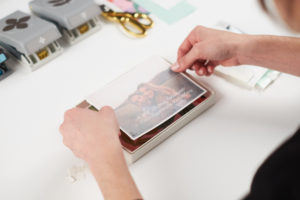
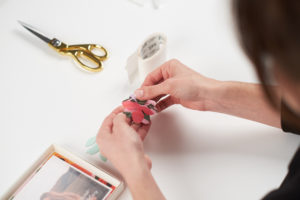
Write a message on your vellum paper using a gel pen.
Step 5
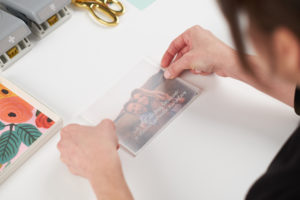
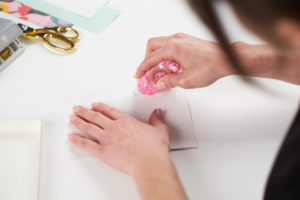
Use tape runner along the back edges of the vellum paper and attach to the front of your photo.
Step 6
Flip photo (with attached vellum paper) over and apply two layers of foam squares to the back. Place squares in the center of the paper and in each corner.
Step 7
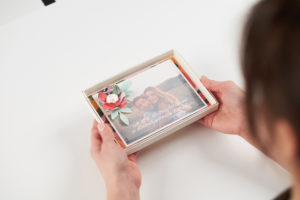
Flip photo back over and carefully place in the center of the box.
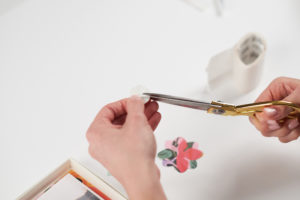
Step 8
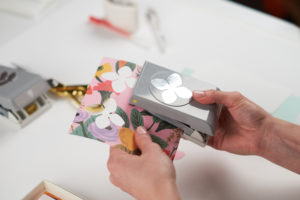
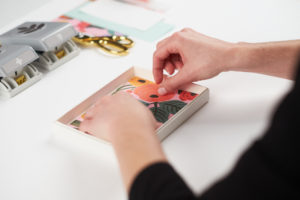
Punch three hydrangea flowers and two leaves with the paper of your choosing
Step 9

Attach flowers at center with Zots, staggering the petals as you stack them.
Step 10

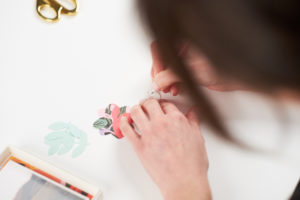
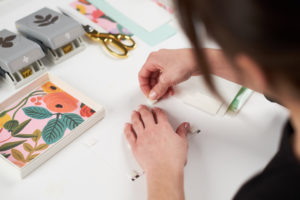
Cut out 2 small circles and cut fringe around them. Adhere together with Zots. Tuft up fringe and draw dots on top circle with a gel pen.
Step 11
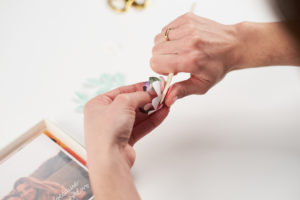
Curl petals of flower using a bone folder.
Step 12
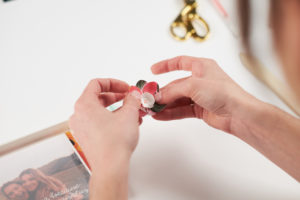
Attach circles to center of flower.
Step 13
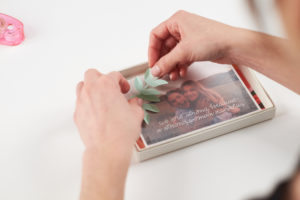
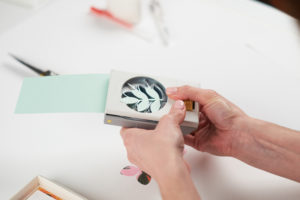
Add dimension to leaves by pinching them, folding each leaf down the center. Use Zots to attach leaves to the top corner of your photo. Branches can overlap in the middle.
Step 14
Stick a Zot to the back of the flower and place it in the middle of the two branches on the photo.
Your Memory Box is ready to be gifted with love. Share some of your favorite DIY moments with us on Instagram, tag us at @papersource!


LOVE THISThanks so much and please keep these ideas/projects coming!!
How nice it is to have step by step instructions to put ALL my favorite PaperSource products to good (no, GREAT) use!!