
Capture the magic of your trips and adventures by creating your own travel journal! DIY journaling is a great way to keep all of your memories in one place, and gives you the freedom to be as creative as you want while making it. We came up with a few easy tips for creating a page layout for your travel journal. Check out our How To Projects page and our YouTube channel for a video of how we did it!
Materials We’re Using:
- Journal
- Washi tape
- Assorted brush tip and bullet tip pens
- Journal stencils
- Tape runner
- Stickers
- Scissors
- Photos or paper ephemera
Step 1: Create a Page Title
First, choose a title that describes the theme of your journal page. For our journal, we chose “Summer Adventures” as the title for this page, but it can be anything related to the trip or activity you want to write about.
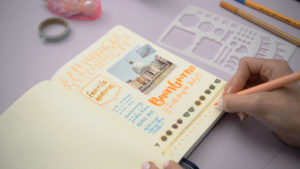
To create the title lettering design shown in the picture, first position a piece of washi tape horizontally as the center line for where you want your title to be on the page. Write the first word of your title in large letters extending above and below the washi tape with a brush tip pen, using thick downstrokes and thin upstrokes.
To create a shadow effect, outline the strokes with a bullet tip pen in a different shade to add dimension.
After that, remove the washi tape to reveal a blank spot across the middle of the word. Outline this space to make a banner. Write the secondary word(s) of your title inside the banner to finish your page title.
Step 2: Create a Themed List
Now, choose a topic to create a list for the page. For example, we chose to list a few favorite memories from the trip, but you could also make a list of cities, destinations, or restaurants you visited, a packing list, a spending tracker list, a list of new food you tried, or anything you want to document.
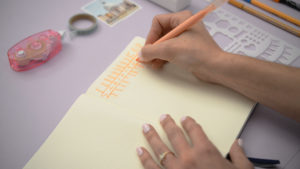
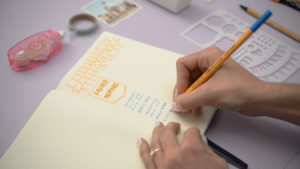
Start by making a title for your list that pops. Create a border to outline the title words using a journal stencil. Then, write your list in the space below the title. Try writing each item on the list in a different font!
Step 3: Showcase a Featured Memory
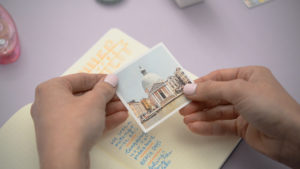
Choose a photo, ticket stub, or other paper ephemera that represents your featured memory and adhere it to the page with a tape runner.
Next, add a bold, hand lettered caption of your choice for the memory. Try using different fonts and different pen colors to make your caption pop off the page even more. We offer in-store hand lettering workshops if you want to learn how to take your journaling to the next level!
Step 4: Finishing Touches
Finally, decorate with some cute sticker accents and washi tape borders. If there’s blank space leftover, fill it in with pen doodles! Making a travel journal is all about showcasing your adventures and memories in a nice way so you can look back and remember them later, so above all, have fun with it. Don’t be afraid to get creative and make it your own!


