You’re probably thinking, “Zutter, what?” Or maybe you’re already a fan of this new DIY tool. To help you discover the magic of the Zutter Bind-It-All and its accessories, I created a simple keepsake book in five easy steps.
Items needed:
• Zutter Bind-It-All
• Wire cutters
• ½” gauge wire (thinner books) or ¾” gauge wires (thicker books)
• Envelopes, cover stock and text for pages
• Chipboard for covers (try adding decorative paper or photos to the cover)
• Xyron 510 or Tape Runner adhesive for attaching paper to covers
• Your imagination!
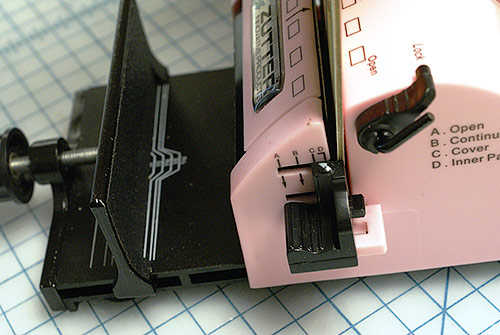
Step 1: Set your guide to “C” for creating the holes in the chipboard. Set your covers (these are finished with Cavallini Gift Wrap) inside opening, stopping at the guide. Make sure the stabilizing foot is out, then pull the handle down.
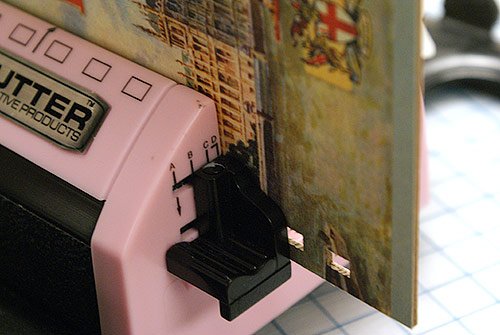
Step 2: Lift covers and set guide to “B” to make continuous hole punches. Your holes will sit in the notch guide from the backside, which keeps the holes aligned. Pull handle down again, and repeat for desired book length (There is book size guided that comes with instruction for making holes completely even).
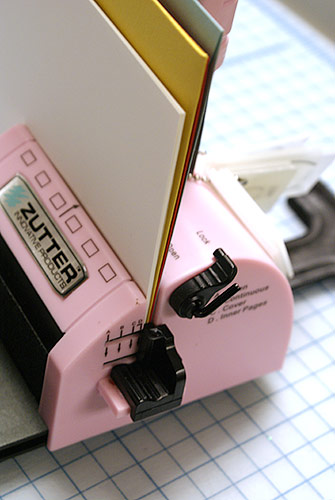
Step 3: Gather your interior page materials and set the guide to “D” to punch holes in your interior pages. (You may need to do them in small bundles)
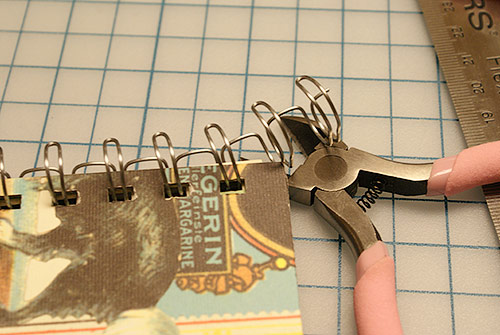
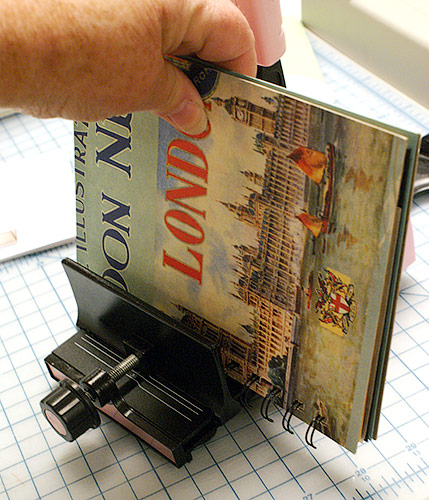
Step 4: Collate your pages and covers, align the holes, and feed your wire. Position your wire with the soft loops ending up on the cover side, then trim to size with your wire cutter.
Step 5: Use the wire gauge guide for accurate crimping. Place your book inside the spacer and pull handle down – The wall pinches the wires to just the right thickness. Repeat until all wires are pinched closed, then you’re finished! You just made a book in less than 20 minutes.
Learn more Zutter techniques at the Creative Spiral Travel Book Workshop. Seats are still available for tomorrow’s class – Register online or call your local store for details!
–Linda
PS colors: paper bag & persimmon
Latest fave: Zutter Bind-It-All


I love my bind it all it is a fantastic product allows me to do things custom which is great!
I have had mine for almost two years, have the blue one, and I love it! I have made so many neat books and gifts with it!
what kind of pages did you put in the book
Love it! Can’t wait to make some items with it for friends and family 🙂
Thanks everyone for the comments!
We love how versatile the Zutter tool is for making “keen” books! For the book above we used the following ingredients: the pages consisted of 8.5×11 text paper (cut in half and trimmed to 5×7), a few half moon envelopes for tucking little notes and lists that can pull out, some regular envelopes wired along the bottom allowing the flaps to still be opened. Then we added some smaller pages for adding a list of summer music, vellum pages as dividers, black sticker sheets with white pens for a chalk-board effect as a “Summer to do list”. Accents were created using papers that were adhered using the baby-xyron and some punches. When finished with some fun stamping it was a book that really shows off some personality and playfulness! These are great for gifts too.
Hope you have time to play with a Zutter this summer. Stop into any store for a quick demo, or if you missed our June class you can take the Artist book class coming up on August 20. This one will feature even more goodies, color washes and stencils – plus you get to add some of your own ephemera that you bring along.
Cheers,
Linda ~ Head of Workshops
I cant seem to get the hang of binding
First time I put the binding on from back to front!
It just doesnt seem to crimp well any suggestions?
What s the difference, cinch or zutter. I have a conch then I was going to get the zutter.
Can someone please lead me to a perhaps PDF of the bind-it-all? I have lost my instructions for my machine and I just need to know the numbers that I need to count too! HELP!
Thank you for your interest! I would suggest reaching out to the machine manufacturer or to our customer service team!